Yes! You pound that $!
Here’s your 25% discount code for Coin Mockup 2 Matte
ss25

tutorial
How To Make Bitcoin Pin Mockup Part 1
Originally written on November 3, 2017, from the earliest version of SignalSupply's blog. Since then many have changed and this article may not relevant and may not reflect the actual situations.
Intro
A mockup is a way to visualize end result before we actually produce it. In this case we’re going to make Bitcoin enamel pin mockup.
For this tutorial I’m using using my own Soft Enamel Pin PSD Mockup template which you can purchase through my website at www.signalsupply.co
I’ll show you how to prepare the design on Illustrator that will perfectly fit on PSD Mockup and then how to apply it inside the psd mockup on Photoshop. That’s why there will be 2 parts in this tutorial: Illustrator part and Photoshop part. Notes that you can also make your design in any app that you prefer, but to create the mockup, you going to need Photoshop.
The tutorial looks long and complicated, but trust me, it's very easy.
This is what we will achieve at the end of this tutorial.

Pretty neat isn’t it? :)
Preparing the design
Ok, let’s do this. First of all you need to create the design. Let’s make Bitcoin’s icon with its famous round orange frame.
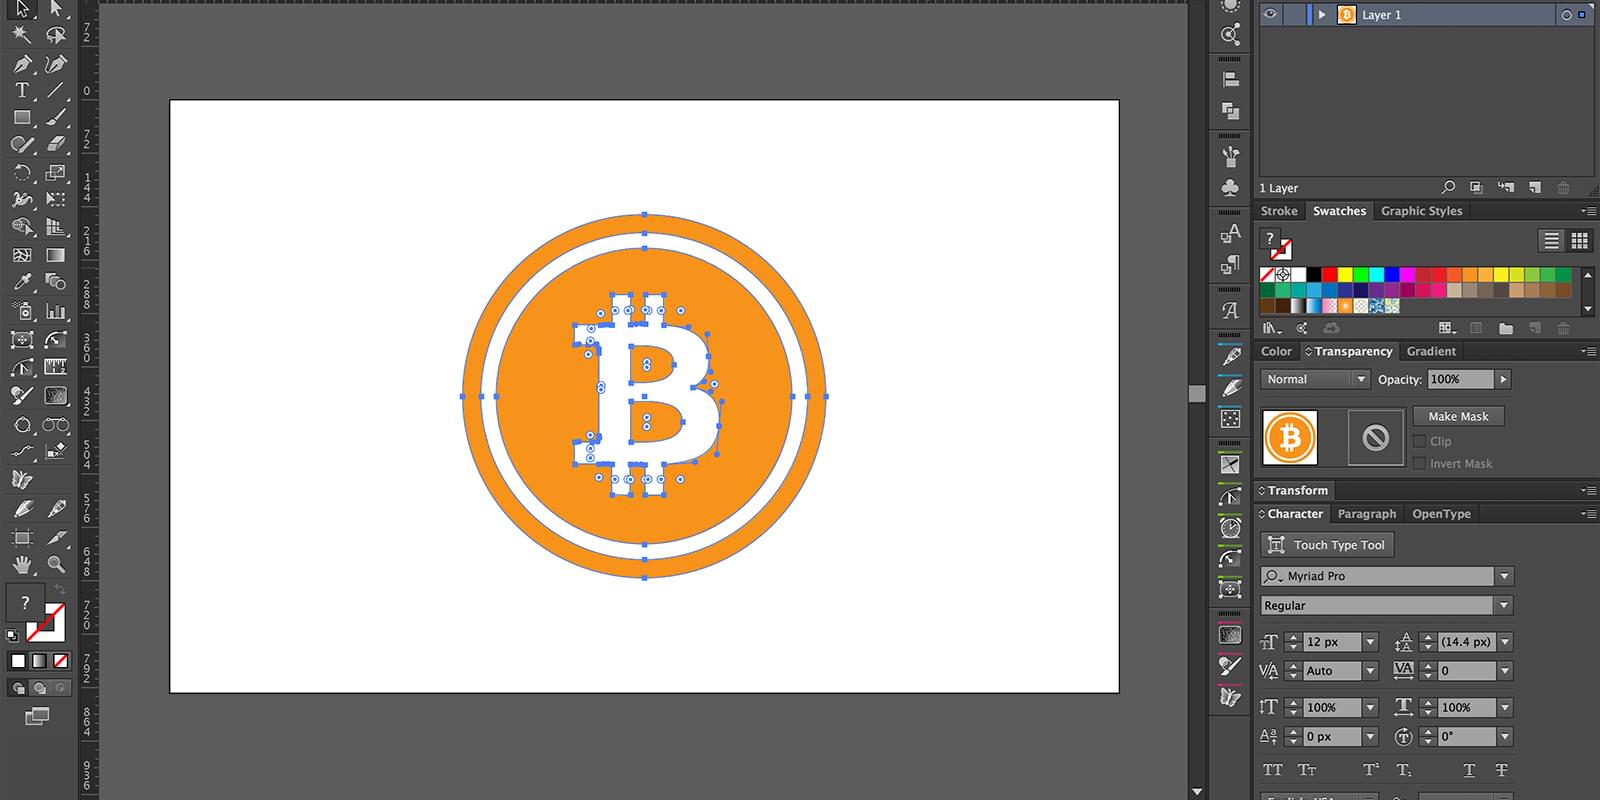
Give it a colors. Just give it flat white and orange colors. All the gradient, shadow and highlight will automatically applied on psd mockup.
Seperate fill color and stroke
One thing you must aware when you make enamel pin is that every colors that attached to each other must be separated with stroke. This stroke will be whatever the pin’s base metal color is.
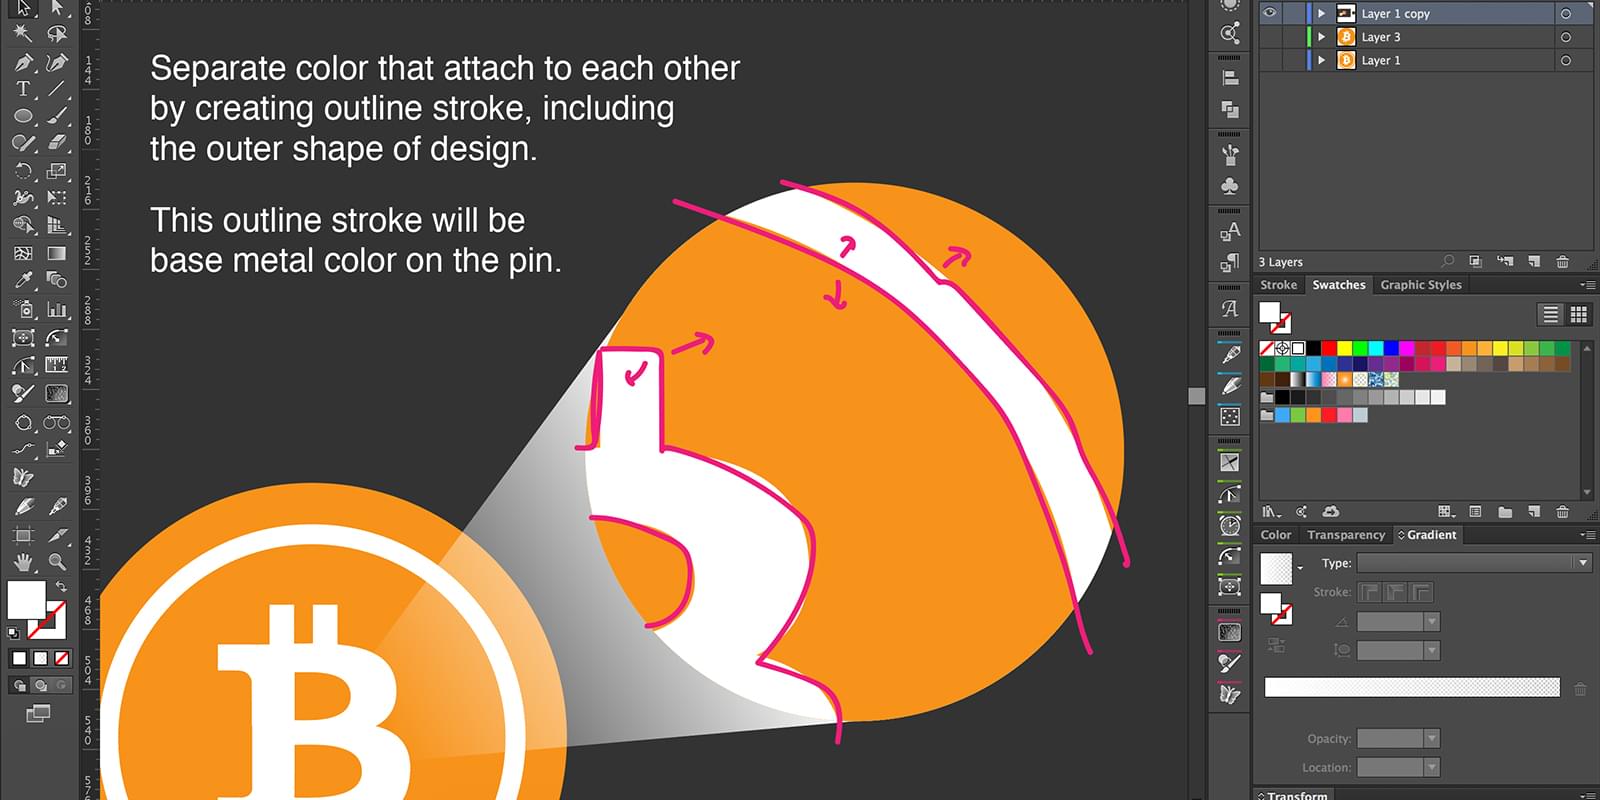
In our Bitcoin design, white and orange are attached to each other. we must separate it with outline stroke.
Right now, don't worry about the stroke color. You can give it any color you want, psd mockup will automatically turn it to pin’s metal color.
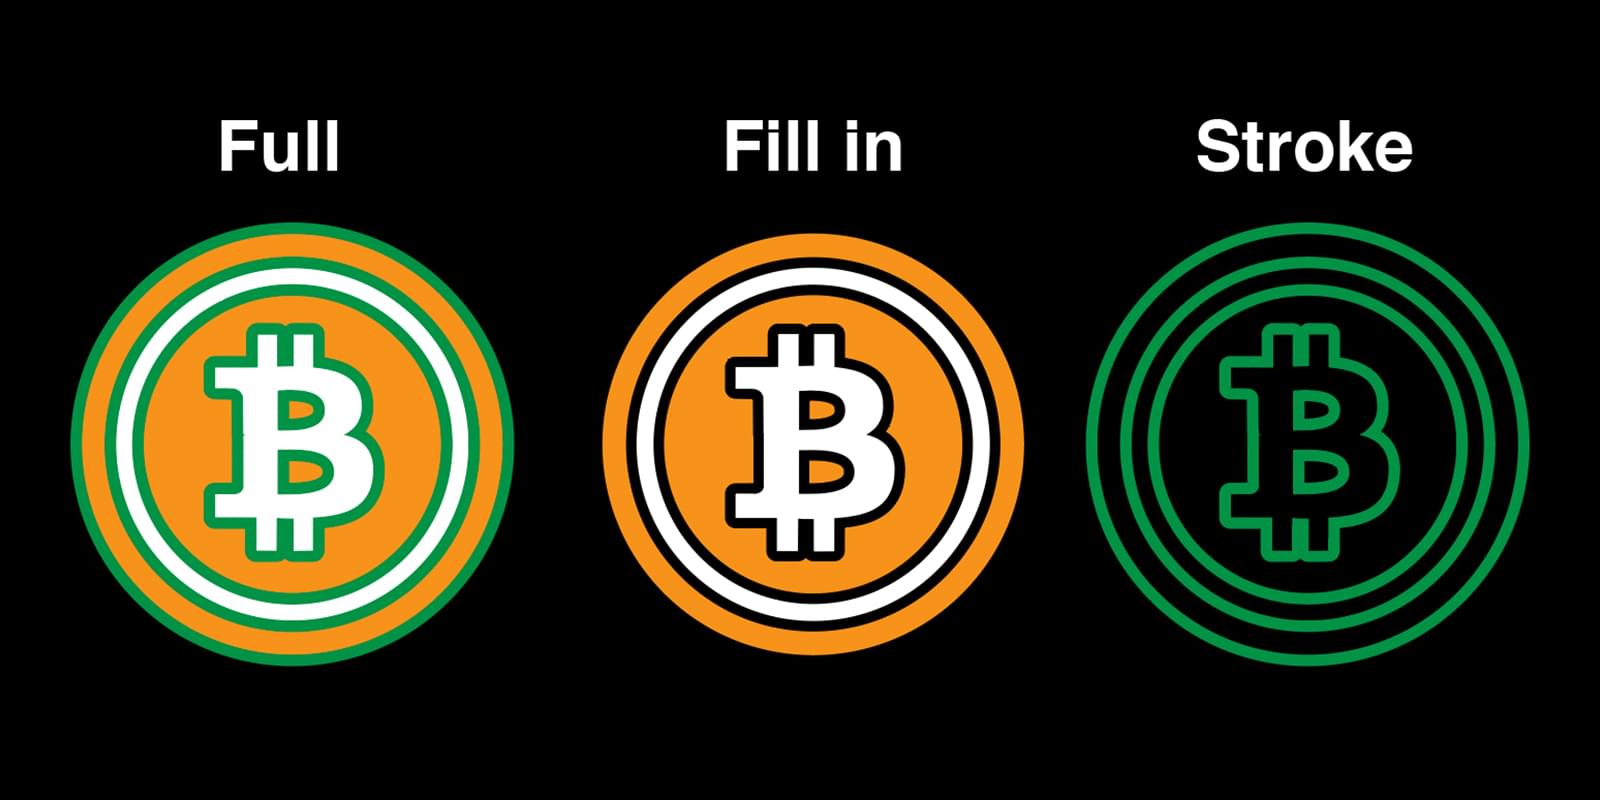
Colors and strokes must totally separated so you must intersect all the objects and make sure no object is overlaying each other. So we will have 2 separated object: one is fill-in object and another one is stroke object.
Right now we are ready to move to Photoshop. Nice!
Continue to Photoshop part here.

Rizal
SignalSupply
